
You Will Need:
Tips Tip stands or displays Base coat Gel polish Nail art (optional) Top Coat Nail Glue
Step 1:
Choose your tips. Make sure that they fit from sidewall to sidewall on your nail. Measure both hands – some nails may not match their counterparts in size. Place all the tips on tip displays or stands. If you do not have a tip stand, now is the time to improvise! Grab any object that is elevated with a flat surface on top and apply the nail tip with some Prestik.
Step 2:
Check the nail tips for any rough edges and gently file away with a nail file until smooth. If you would like to change the shape of the nail tip, gently file the nail to your desired shape. Buff the surface of the tip and then wipe off any dust with sanitiser and a wipe. If this is your first-time creating nails out of desperation to have fabulous nails again while you wait for lockdown to end, rather keep the shape of the nail tips you have. Filing can be tricky and you do not want to have uneven nails or break the nail tip.Step 3:
Apply your base coat and cure the tips. You want to make sure that your press on nails will last, until you decide you would like a change of design.Step 4:
Choose a gel polish colour and apply it to your tips. Cure the tips. Make you sure you apply sufficient coats to provide full coverage. I would recommend Crystal Clawz Gel Polish – it has a higher pigmentation than traditional gels, so a little goes a long way! Crystal Clawz gel polish also does not chip, peel, fade or lift, so your nails will look as beautiful six weeks down the line, as when you first made them! Get creative. Mix colours, add some pop, do a stunning ombre. The sky is the limit! Apply your top coat and cure. If you are looking for that chic and elegant look, try the Crystal Clawz Rubber Matte Top. It gives that perfect matte finish that will have you swooning.
Step 5:
Now it is time to let your imagination run wild! If you have decided to stop at adding colour to your nail tips, you are missing out! Let your personality come through and create stunning nails to compliment your style. Add beautiful crystals or try out transfer foils or stamping. Go for glam with beautiful silver striping tape. I know at this point you may be overwhelmed – I mean how do you choose? I am going to be cheesy and say ‘follow your heart’. What nail art excites you? If your heart skips a beat, then that is the one!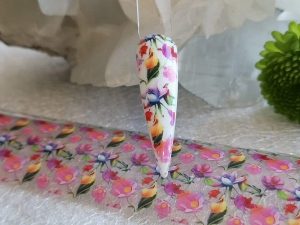
Step 6:
Apply your top coat. Make sure that the top coat is evenly spread across the tip. Cure and voila! You have created your very own press on nails!